Mar 22, 2011 | 5 Min Read
Master Your Web Shop: Essential Tips for Manager Site Success
Get in touch with us
Reach out to us for any inquiries or support, and let’s connect!


Using Google Analytics For Success with WebShop Manager
Using Google Analytics
Information is power, and with the astonishing amount of information that you can get from a Google Analytics account you will start making better decisions for your company’s website. The purpose of using Google Analytics is to observe your website’s traffic, monitor your site’s goals as well as your shopping funnel, track your email campaigns, banner ads and social media efforts, create customized reports and dashboards and so much more!
If all of this sounds way over your head, do not get discouraged. Utilizing your Google Analytics account to its fullest potential should be an ongoing project. You do not need to try and figure out how to use all of its features in one day. The purpose of this article is to provide you instructions on how to set up your account, add the tracking widget to your WSM site and create site ‘Goals’ to be tracked.
First, you will need to set up your Google Analytics account. When entering your URL, make sure that you select HTTP or HTTPS depending on your site. Web Shop Manager eCommerce sites are HTTP sites.
Web Shop Manager Makes Using Google Analytics Easy
Now that your account is created and your profile is set up, it is time to start tracking! For all of our Web Shop Manager (WSM) website design clients, we have made tracking conversions with Google Analytics so easy. Typically you would need to add a tracking code onto every page of your site, but with WSM simply log into your site and edit the Template section of your site. You can find this page in the backend of WSM within the Content section.
For most WSM accounts you will have one template titled Default, click edit template and paste this widget just before the </body> tag in your template. (see left image)
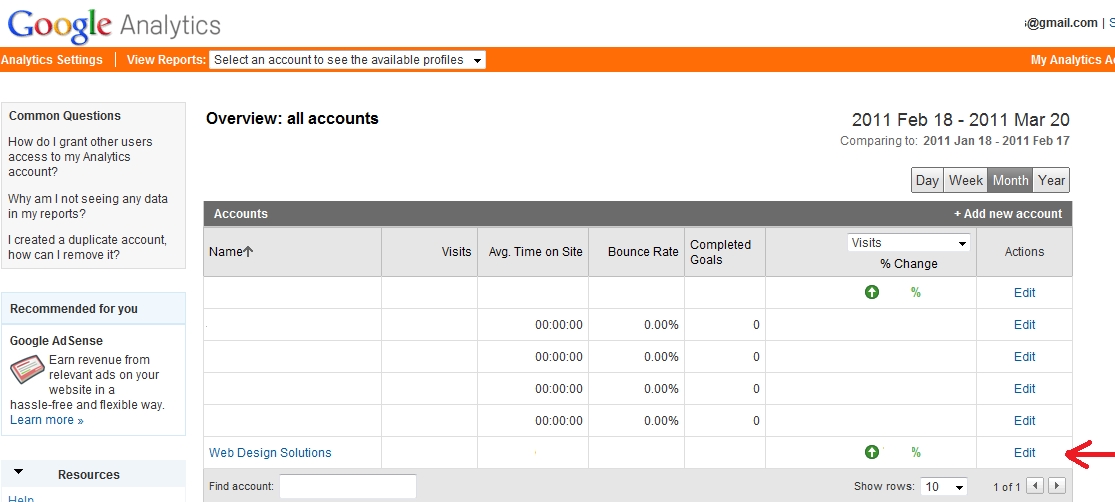
You will now need to replace the Xs with your UA number. To get your UA number from your newly created Google Analytics account go to your Analytics Settings page and click on Edit under the Actions column. (see below image)
Then click on Check Status on the top right hand side of the page. Your tracking code can be found and copied from that page.
Once you have added this code to your template page make sure to Save Changes. Now Google will begin tracking information from your website. Even though tracking has started, I would recommend allowing at least two weeks for it to gather data before you start making decisions based on these statistics.
Hints About Your Google Analytics Profile
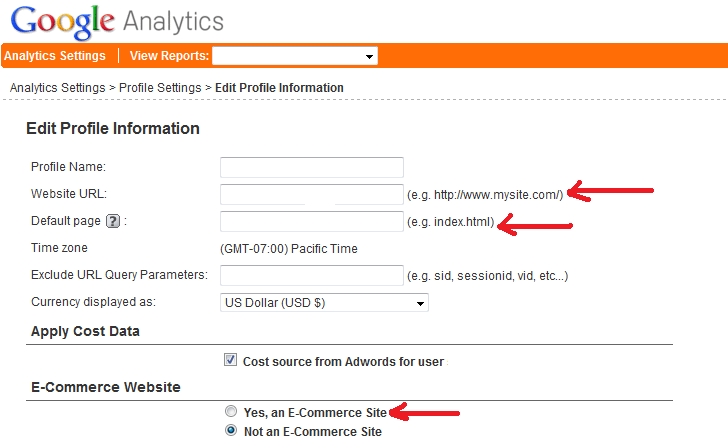
Get the most out of your reports by updating your Website Profile correctly. Since your home page can sometimes get linked to as two different URLs you should add www.website.com/index.html to your default site so that Google does not track www.website.com and above as two different pages. You can learn more about Google Analytics default url on Google’s Analytics help page. If you are an e-commerce site, then make sure to select YES to e-commerce reporting. These seemingly minor changes will help you analyze more accurate data from your new analytics account.
The Most Important Step to Setting up Your Google Analytics Account
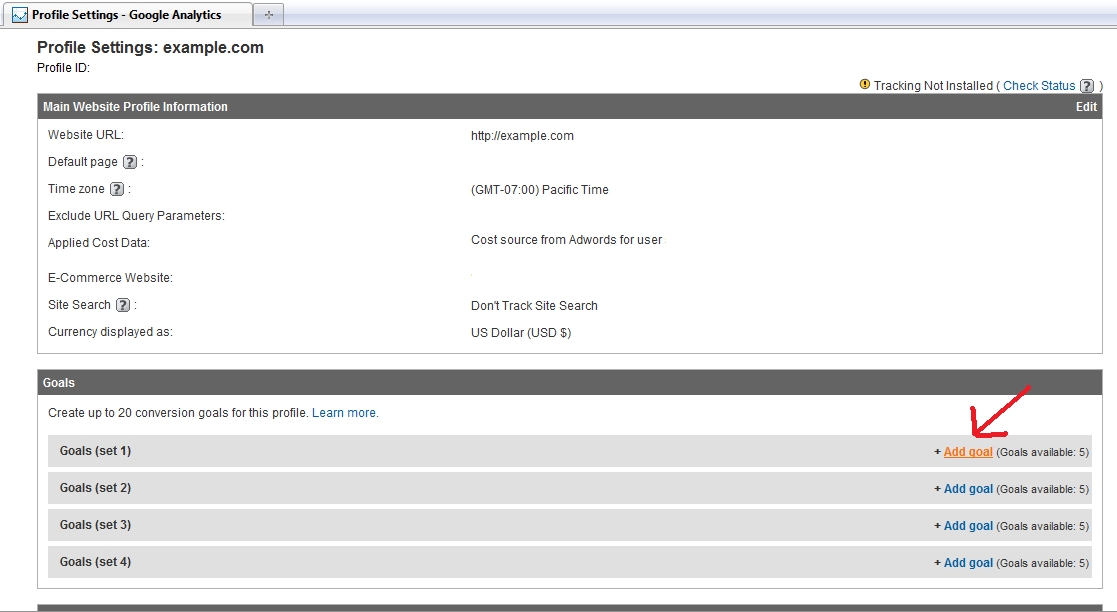
Since the Goal of almost all eCommerce websites is to create conversions, we will need to set up analytics Goals to track your conversions. Conversions vary for different website owners. Most often they are a sale, but they can also be a request for more information, a Contact Us form fill or a sign up for your monthly eNewsletter.
Whatever your goal may be, you will need to determine what URL will equate a conversion for you. Examples of URLs triggered by conversions are a Confirmation Page, an order Thank You page, or any other page that can only be seen by those who have completed a conversion.
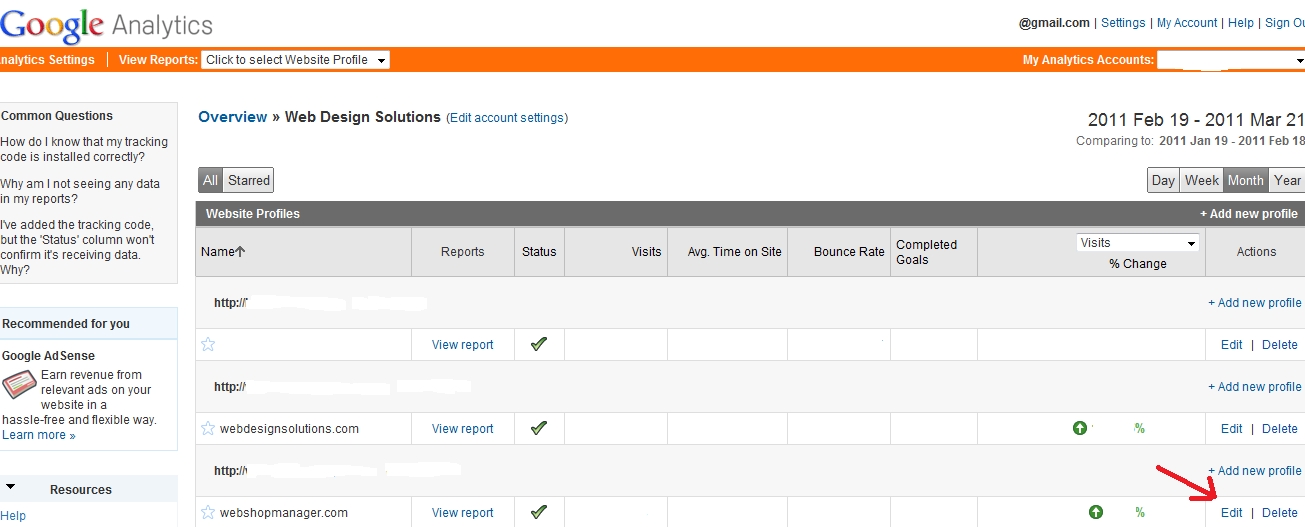
Now, go back to your profile page, click on your account name and then click Edit under the action column (you should be on a different page than where you retrieved your UA number).
Select one of the four goal slots available and select Edit. Enter your goal URL and goal name, (purchase, eNewsletter, Contact, etc) and then turn the goal ON.
Since you have already added your tracking code and now you have created a goal, you will not only be tracking visitors but conversions as well. There are a couple ways to see if you set this up correctly. If you typically get at least a few orders a day you can simply wait for an order to come in and see if your account tracked it. If you want more instant gratification, you can place a test order (or test eNewsletter sign up, etc) through your site and check to see if it got tracked.
Want More Google Analytics & eCommmerce Guidance?
Here at Web Shop Manager, your success is our success. We strive to stay on top of all eCommerce trends and to relay this information to our users. Follow us on Twitter at twitter.com/webshopmanager to get updated when we post more guides and tips for using your website to its fullest potential. We will continue our ‘Help With Google Analytics’ blog series next month were we will cover Funnel Tracking!
By: Dana Nevins
More On Related Topic
Explore our highlighted blogs for the latest insights and trends in the industry.
Developing an E-commerce Site: List, Organize, and Import Millions of Products
Web Shop Manager - Developing An eCommerce SiteIf you are looking to start developing an eCommerce site and are unsure how or where to get started...you've found your starting point. Web Shop Manager has...
Using Google Analytics: Essential Website Metrics (Part 1)
Web Shop Manager - Using Google AnalyticsCreating and maintaining success in eCommerce is very much an ongoing battle. You can’t get everything moving in the right direction and then simply let your well oiled online selling...
Minimalist Website Design: What’s the Deal?
Minimalist Website DesignBefore going into any detail on minimalist website designs, it needs to be made clear that no style of web design is better than others. It all depends on what the website is trying...
Ready To Grow Your Business?
Ready to elevate your online presence? Contact Web Shop Manager for expert solutions tailored to your
needs. Let’s build something amazing together.