Retail Auto Parts eCommerce Website Builder with YMM Fitment Search
Turn parts shoppers into retail-ready buyers. PartsLogic™ Smart Search and native YMM fitment help customers find compatible products quickly—on mobile or desktop—while your catalog stays organized, searchable, and SEO-friendly.
The Ultimate Retail Parts Ecommerce Solution
Retail parts eCommerce is different—shoppers need to confirm fitment fast, trust the data, and buy with confidence. Web Shop Manager is built for automotive catalog complexity, and PartsLogic™ Smart Search turns high-intent queries into compatible results with fitment-first discovery, smarter filtering, and fewer dead ends.
Launch quickly, scale cleanly, and reduce wrong-part friction with platform + data + fitment working together.
Flexible Aftermarket Data
Manage product and fitment data from multiple sources (brands, WDs, in-store systems) while keeping categories and product pages consistent, searchable, and SEO-friendly.
Expand Your Reach
Bridge online and in-store sales with a streamlined path from research to purchase—built for retail parts buyers who want answers fast and options at checkout.
Informative Product Pages
Reduce “Will this fit?” friction with detailed specs, fitment context, imagery, and content that supports conversion and organic visibility.
Smart Search
PartsLogic™ Smart Search helps customers find the right part faster with autocomplete, synonyms, guided refinement, and advanced filters—reducing zero-results searches and improving conversion.
Vehicle-Specific Products
Match parts to specific vehicles using Year-Make-Model lookup powered by ACES/PIES-aligned fitment data workflows—so shoppers see compatible products and you cut wrong-fit returns.
Build a Community
Grow trust and repeat visits with Reader’s Rides and classifieds—community content that also expands long-tail search visibility.
Optimize for Mobile
Mobile-first browsing, filtering, and checkout built to keep parts shoppers moving—supporting speed, UX, and performance signals.
Advanced Features
Streamline operations with essential tools that support merchandising, promotions, and ongoing optimization as your catalog grows.
Fitment-first UX + smarter search = higher conversion, fewer wrong-part orders, and a better buying experience.
We Have Everything Automotive
Built for catalog complexity, fitment accuracy, and retail conversion.
Retail auto parts catalogs are messy by nature: huge SKU counts, frequent updates, fitment rules that change by year/engine/trim, and shoppers who search with high intent (vehicle + part type + brand + symptoms). Web Shop Manager is built for that reality—so your store stays fast, your catalog stays organized, and customers can confidently buy compatible parts the first time.
With PartsLogic™ Smart Search layered on top, shoppers get a smarter path to the right product through fitment-aware discovery, guided filtering, synonyms, and fewer dead ends—improving conversion while helping reduce wrong-part orders and returns.
- Handles large catalogs without bloating performance
- Supports fitment-first shopping (Year-Make-Model and compatibility context)
- ACES/PIES-aligned data and application workflows (where applicable)
- SEO-friendly structures for categories, brands, and vehicle-intent landing pages
- Search optimization that reduces zero-results and improves product discovery (PartsLogic™)
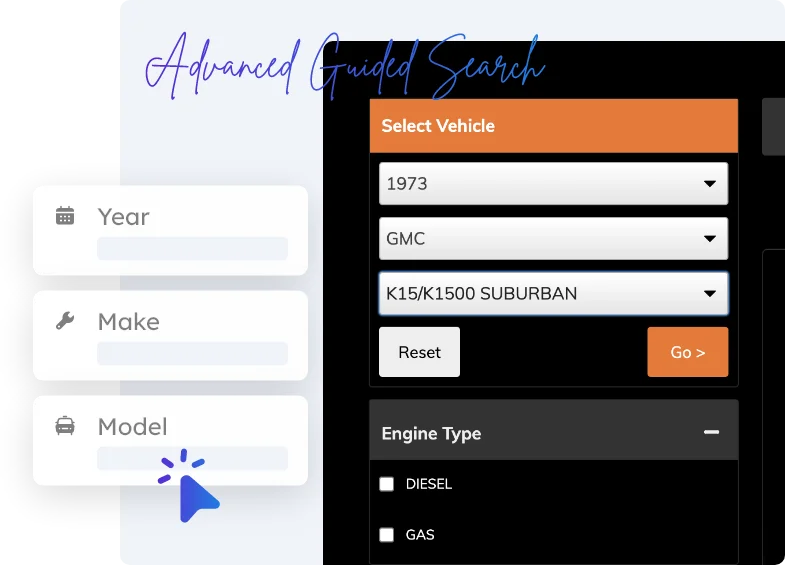
A Smarter Way to Search
Auto parts shoppers don’t browse—they search with intent. PartsLogic™ Smart Search helps customers find compatible products faster with fitment-aware results, intelligent suggestions, and guided refinement that keeps buyers moving instead of bouncing.
Whether they start with Year-Make-Model, a part number, a brand, or a symptom (“brake squeal,” “misfire”), PartsLogic connects the query to the right categories and compatible products—improving conversion while reducing wrong-fit orders and returns.
- Fitment-first discovery: Year-Make-Model filtering that prioritizes compatible results
- Autocomplete + query suggestions: faster discovery on mobile and desktop
- Synonyms + terminology coverage: catches “tail lamp / taillight,” “caliper / brake caliper,” etc.
- Zero-results prevention: smart fallbacks and guided refinement instead of dead ends
- Part number & keyword intelligence: supports high-intent lookup behavior
- Guided filtering: attributes + fitment signals that narrow results without frustration
- Merchandising controls: boost/bury, featured brands, seasonal priorities (where applicable)
- Search analytics: see what shoppers want, what they can’t find, and optimize accordingly
The result: faster product discovery, higher conversion rates, and fewer wrong-part orders—especially for retail buyers shopping on mobile.
Connect with Car Enthusiasts
Aftermarket buyers don’t just shop—they research builds, compare parts, and follow brands they trust. Web Shop Manager helps you turn that behavior into traffic and sales with community features that keep enthusiasts engaged and give search engines a steady stream of fresh, relevant content to index.
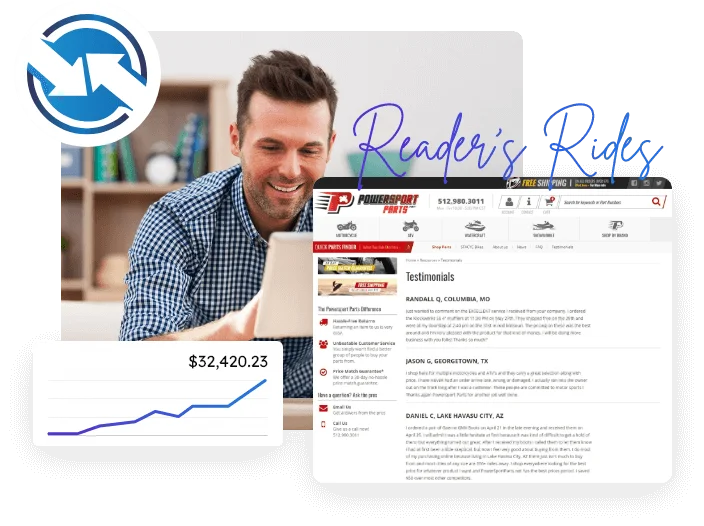
Reader’s Rides
Showcase customer builds with vehicle details, photos, and the parts used. This creates shareable content that attracts long-tail searches (vehicle + mod + part type), builds trust, and keeps shoppers coming back.Generate valuable user-generated content
Add a marketplace-style classifieds area to increase return visits and time on site. More engagement signals + more indexable pages = more opportunities to rank and introduce new buyers to your store.
Use community content to grow your audience—then convert with featured product links, newsletters, and promotions tied to vehicle interests.
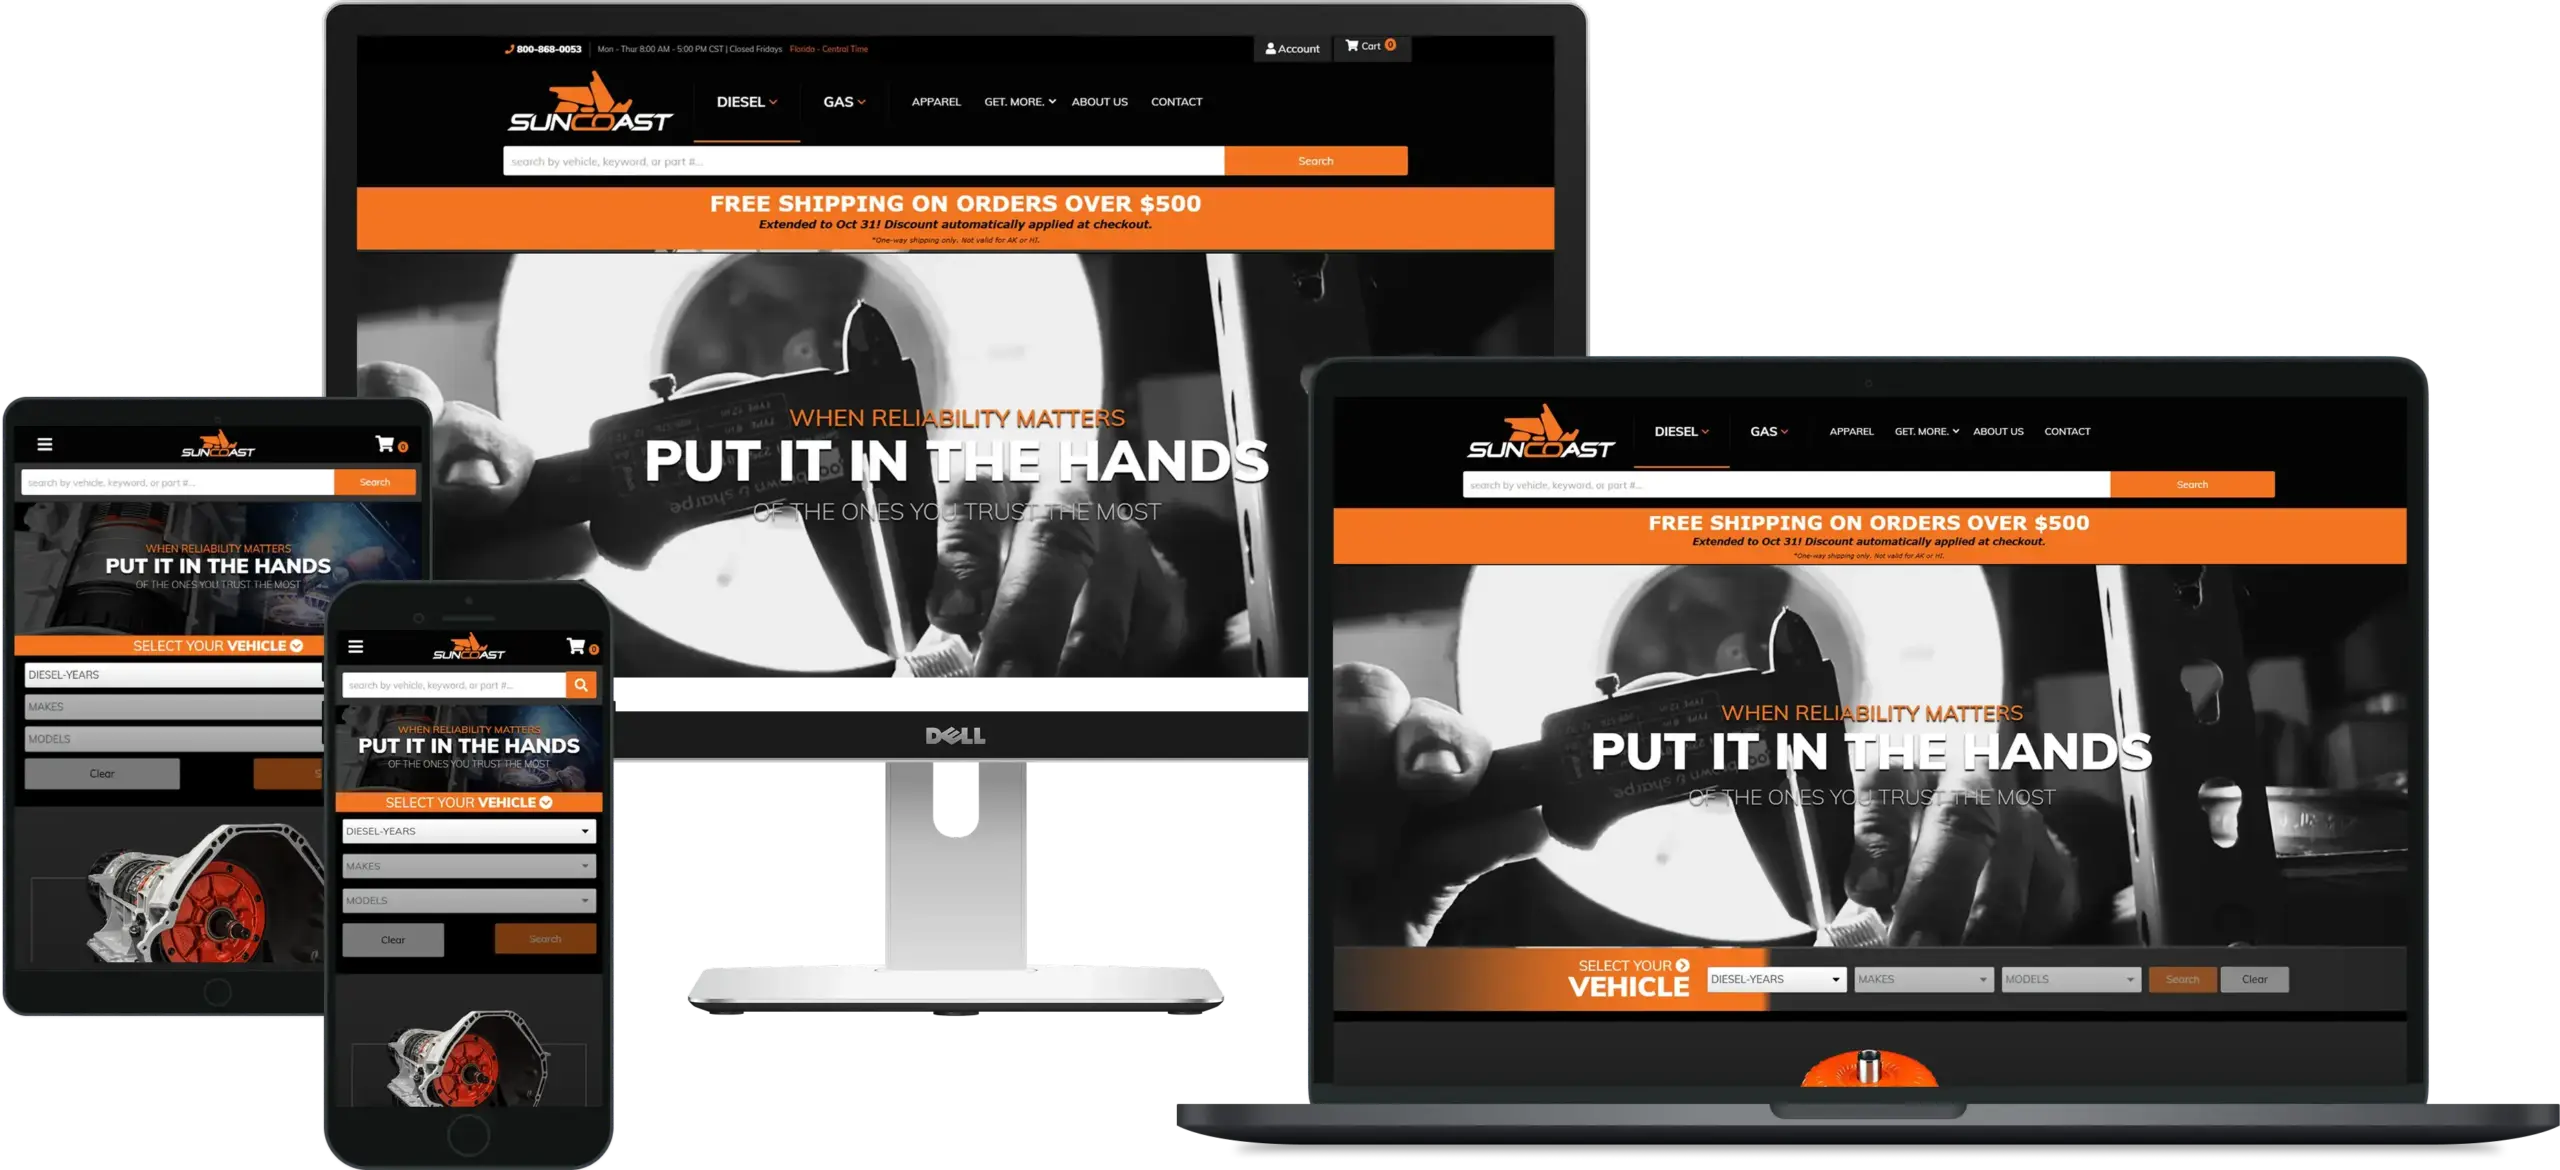
Reach Buyers Across Devices
Mobile parts shopping is high-intent—customers are searching fast, comparing options, and trying to confirm fitment on the go. Web Shop Manager’s responsive, mobile-first design keeps browsing, filtering, and checkout smooth across smartphones, tablets, and desktops, so shoppers can find the right part and buy with confidence on any device. Built using Google-aligned responsive design best practices to support speed, usability, and performance signals—so you don’t lose sales when buyers start on mobile and finish on desktop (or vice versa).
- Mobile-first browsing and filtering for large catalogs
- Fitment-friendly UX that reduces “will this fit?” friction
- Faster paths to product pages and checkout on every screen size
- Consistent experience across smartphones, tablets, and PCs
Recent Works: Transformative
eCommerce Solutions
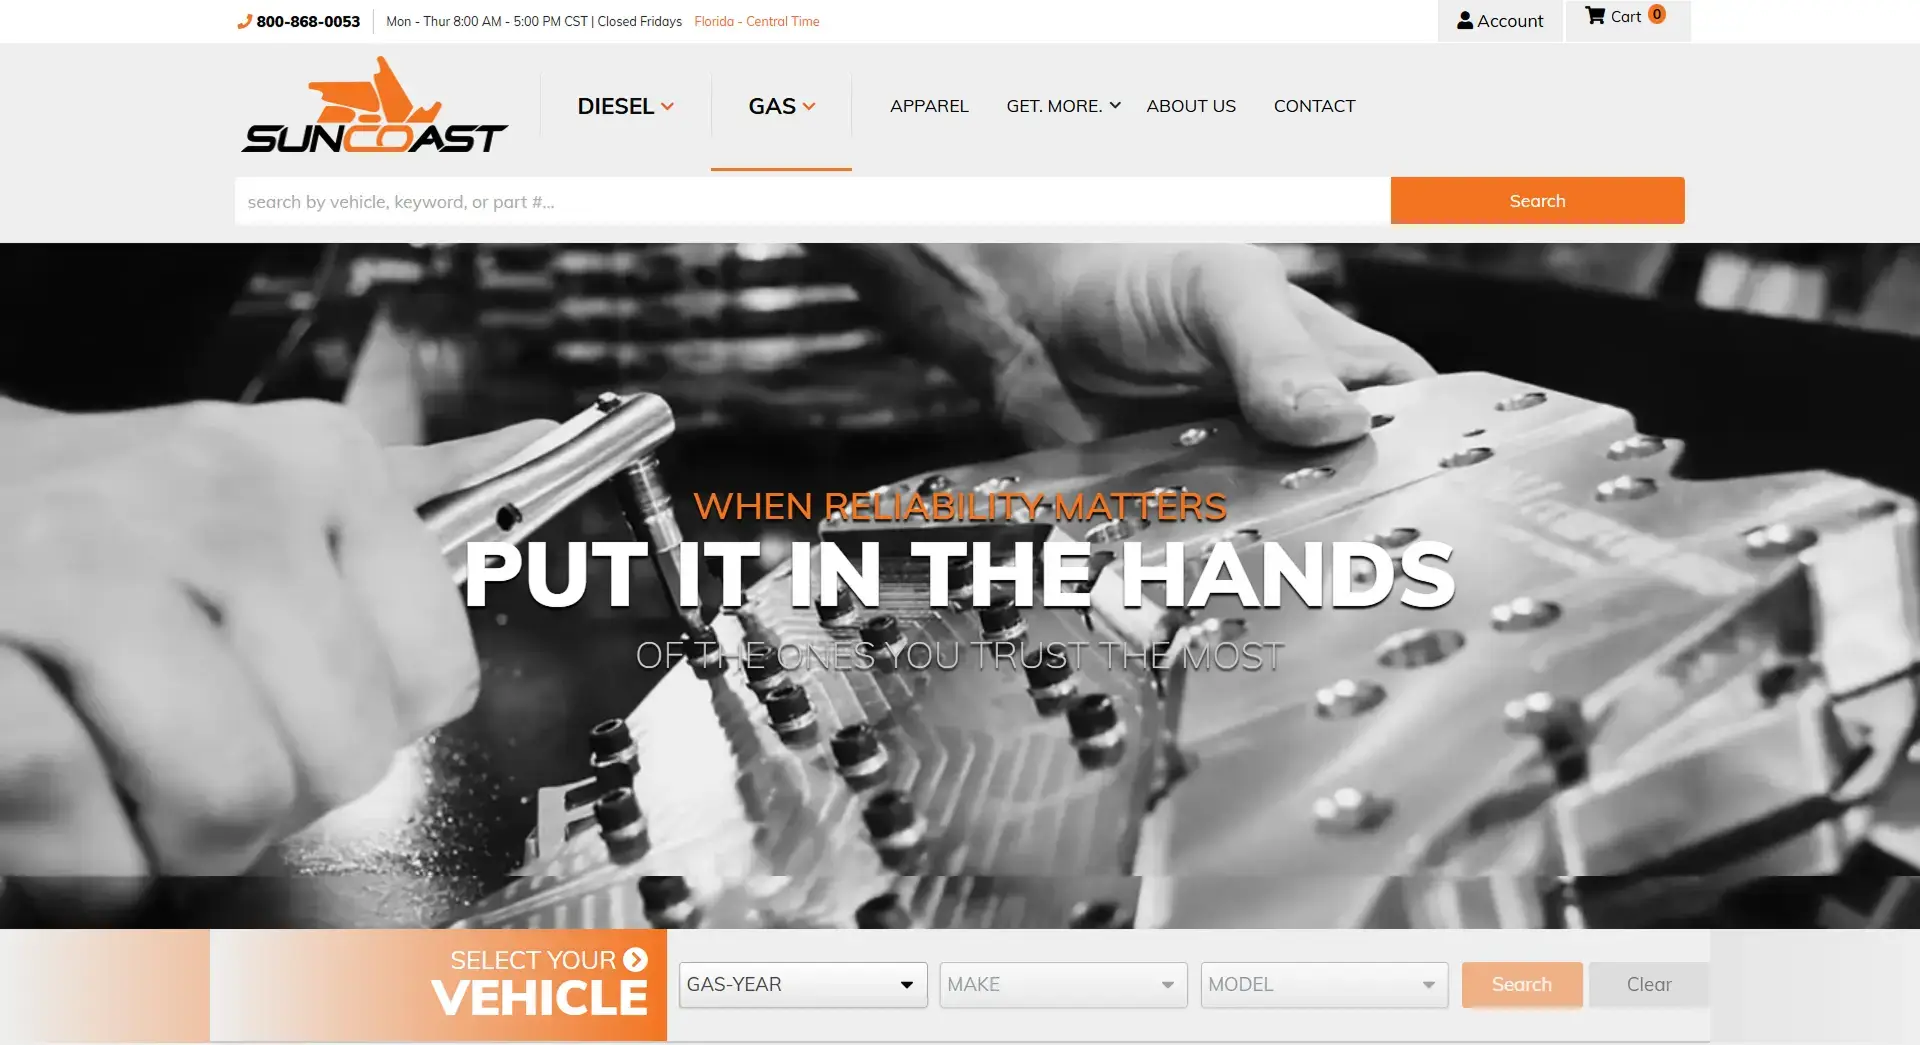
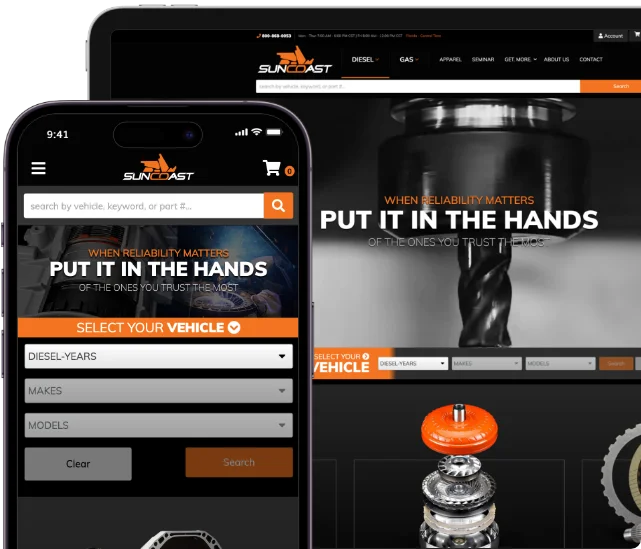
New Site for SunCoast Performance
SunCoast Performance launched an award-winning website featuring dual themes for gas and diesel—built to serve multiple buyer paths while keeping the experience fast, clear, and conversion-focused.
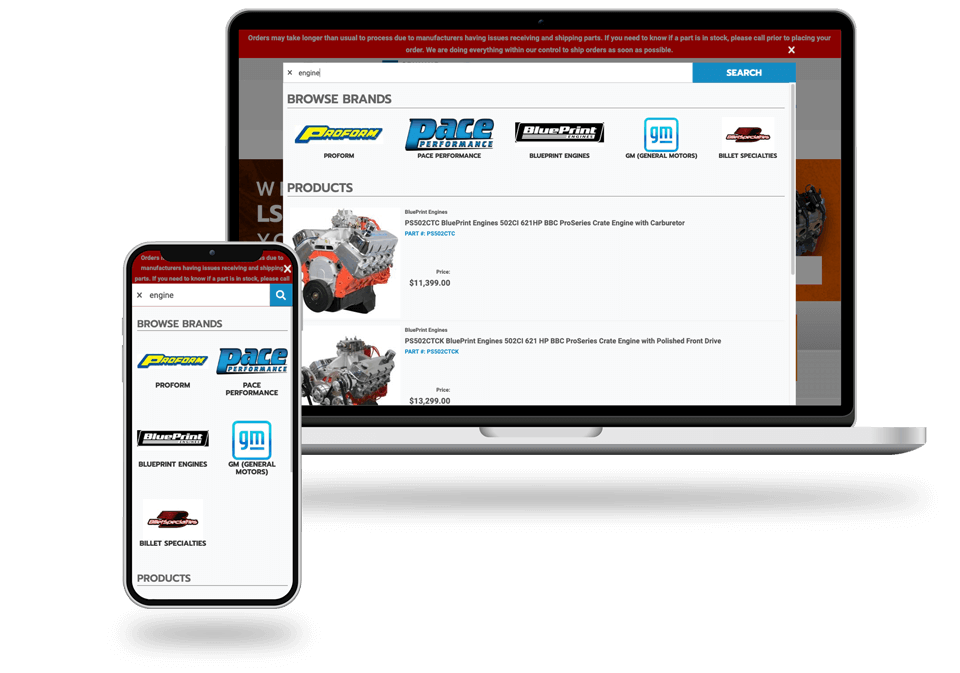
Pace Performance Review — 6% of Traffic Drives 42.5% of Revenue with PartsLogic Search
Pace Performance is a brick-and-mortar GM parts powerhouse with a growing online store. With PartsLogic™ Search, high-intent shoppers convert fast—so a small slice of traffic drives a huge share of revenue.
Drive Your Brand Further with 25 Years of Automotive Expertise
Your brand, your rules. We create custom designs that reflect your business and resonate with your target audience—from brand identity and creative direction to an eCommerce experience built for automotive parts shoppers.
Our data-driven approach ensures your website doesn’t just look great—it performs. With fitment-first UX, conversion-focused site structure, optimized landing pages, and SEO strategies designed to capture high-intent searches, we help you earn visibility and turn traffic into customers.
Let us be your partner in building an automotive parts empire.
Retail Parts eCommerce Store FAQs
Quick answers about fitment-first shopping, PartsLogic™ Smart Search, catalog complexity, and
how to convert retail auto parts buyers online.
A retail auto parts eCommerce store is an online storefront that helps shoppers find and buy the right parts quickly—often starting with their vehicle (Year-Make-Model), then narrowing by category, brand, and attributes. The best retail parts stores combine fitment accuracy, strong product data, and fast mobile shopping to improve conversion and reduce wrong-part returns.
YMM fitment search helps shoppers filter to parts that match their specific vehicle, reducing “will this fit?” uncertainty. When buyers see compatible results first, wrong-part orders drop—and return rates typically improve.
PartsLogic™ Smart Search is fitment-aware search designed for automotive shopping behavior. It helps customers find parts faster with autocomplete, synonym coverage, guided refinement, and fewer dead ends—improving product discovery and conversion, especially on mobile.
Yes. Web Shop Manager is built for automotive catalog complexity—large SKU counts, frequent changes, and fitment-driven product relationships—so your site stays organized, searchable, and performance-friendly as you scale. Explore WSM Data Services and Standards
Yes. The platform is designed for responsive, mobile-first shopping so customers can browse, filter, confirm fitment, and purchase smoothly across devices—whether they start on mobile and finish on desktop or vice versa.
They create community-driven content that attracts long-tail searches (vehicle + mod + part type), increases engagement, and builds trust. That visibility and loyalty can translate into repeat visits, brand advocacy, and more sales.
Ready To Grow Your Business?
Ready to elevate your aftermarket eCommerce presence and conversions—across auto, truck, powersports, marine, and more? Connect with
Web Shop Manager for tailored solutions: strategy, platform, and performance in one team.