How To Set Up Google Authorship | Web Shop Manager
Google values blog posts that have Google authorship markup much higher in searches than those without Google authorship. Take advantage of this How-To article written by Web Shop Manager's in-house SEO specialist, Dustin de Koekkoek, to help your blog posts reach the top of Google searches and be read by more viewers!
How to Set Up Google Authorship Steps
Step One: Verify your email address on Google+
Google first wants to make sure that you are the owner of your email address. To complete this step you will need to have a Google+ profile set up. If you have not created an account yet, you will need to set up a personal profile, not a business page. Make sure you are using a recognizable headshot as your profile photo. Since Google Authorship intends to create a personal experience between a reader and publisher, you cannot use your dealership logo as your profile photo.
Once your Google+ profile has been created, there are several options on how to set up Authorship:
Option 1.) Single Author with no About Me page:
If only one person will be publishing blogs for the website and there is no “About Me” page for the person writing the blogs, Google Authorship markup is easy to set up.
Within the <head> section of the website's page template, add the following piece of Google Authorship code:
<link href=”http://plus.google.com/123456789012345678901/” rel=”author” />
Substitute your own Google+ profile URL into the 'href' attribute - or change the long number to match your Google+ profile ID which can be found in the URL of your Google+ page:
![]()
Option 2.) Several Authors with no About Me pages:
If you have more than one person writing and publishing blogs, you cannot use the header code option; instead you will need to include a linked byline naming the author on each individual posted article.
You can do this from within your site template, or by manually pasting at the top or bottom of the article text, as long as the name is linked to the author's Google+ profile.
The Google Authorship code is essentially the same, but rather than appearing as a 'link' element in your page header, it appears as a visible hyperlink on your article page:
<a href="http://plus.google.com/123456789012345678901/" rel="author">Author Name</a>
Again, substitute the appropriate Google+ profile ID for the long number in the link URL, and make sure to include the 'rel="author" parameter to highlight that this is the author's name.
Option 3.) Individual Authors with About Me pages:
If individual authors have their own profile/’about me’ page on your website, it is recommended to link to their profile, instead of to their Google+ account.
Use the same Google Authorship code as above, but change the 'href' attribute to point to the 'about the author' page:
<a href="http://www.yourwebsite.com/about-author-name" rel="author">Author Name</a>
From the individual author's 'about' page, you should then add a link to their Google+ profile, this time adding 'rel="me"' where you would normally add 'rel="author"'.
<a href="http://plus.google.com/123456789012345678901/" rel="me">Find Author Name on Google+</a>
This is the most complicated method, but also the most powerful. You can also use this Google Authorship markup method if you are the only contributor to your website or blog, but still want to link to a profile page that you have direct control over.
Step Two: Link Back to your Google+ Profile
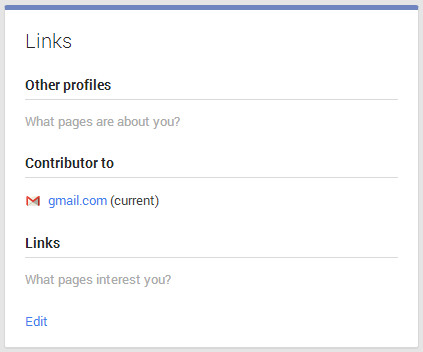
Whichever option you use, you must then link back to your website from your Google+ profile by adding a text link to your website or blog homepage in the 'Contributor to' section of your Google+ profile.
On the right side of the “About” page of your Google+ profile, there is a place to add “Contributor to” links - link to your content from here.

- If you have a bio page on your blog, link to this bio.
- If you don’t have a bio page, link directly to the post itself.
Step Three: Confirm that Authorship is working correctly
Once Google Authorship is set up, test that it is working correctly using the Google Structured Data Testing Tool (http://www.google.com/webmasters/tools/richsnippets) - this will help you to identify any problems with the way you have set up the code on your page.
IMPORTANT NOTES:
- Be patient. It can take several weeks for your Google Authorship markup information to begin appearing in search results, so don't worry if it is taking some time - just keep publishing high-quality articles in the meantime.
If you want to jump start your authorship profile, go back to all the articles posted by you over the past year and have the site link the article to your Google+ profile!

BEDSLIDE - Client Testimonial
"The best thing out of everything was that our sales went up. The new site had a better design, the checkout process was better, and ultimately achieved all of our goals. That site has been up for a year and a half and we’re very happy with it, it’s still awesome." - Jake Plappert